Wednesday, November 9, 2011

Hello Kitty Blog Hop Winner

I have a winner of the Hello Kitty Blog Hop.  The winner is...


Congratulations, Gaylynn!  You are the winner of the Pink By Design Honey Pie Stamp Set!  I'll be e-mailing you to get your mailing address.

I hope you all will stop back by a little later.  I'm working on a Silhouette Studio Design Edition tutorial, and I'll share that with you as soon as I get it finished.  I also have some projects in the works that I'll be sharing over the next week or so.  Hope to see you then! :)


Saturday, November 5, 2011

Hello Kitty and Friends Blog Hop

Hi, everyone!  Welcome to Pretty Paper, Pretty Ribbons and the Hello Kitty and Friends Blog Hop!  I just love Hello Kitty, and I'm so happy to get the chance to use my Hello Kitty cartridge again!

We have lots of FABULOUS projects and prizes for you today, so make sure you stop by each and every blog.  This hop lasts 2 days, so you'll have plenty of time to get through all of the blogs.  If you've arrived here from Ashley's blog, then you're in the right place. If you've just stumbled upon this post and would like to start at the beginning, check out Emily's blog.

I've been in a very Thanksgiving-y mood lately, so I wanted to try to incorporate Thanksgiving into my Hello Kitty project.  The problem is that there are no Thanksgiving images on the Hello Kitty Greetings Cartridge, and I wasn't able to find any HK Thanksgiving SVGs anywhere.  So, I just had to figure out how to make my own!  Here's my project:


This is an A2 sized card.  I got the turkey and pumpkin from Create a Critter, the Hello Kitty base image from Hello Kitty Greetings, and the pilgrim attire from Paper Doll Dress Up.  The sentiment is from Pink By Design's Bountiful Blessings stamp set, and the ribbon is from Pink By Design's Halloween Crinkle Ribbon Set (which happens to work really well for Thanksgiving, too).  

I got the idea for this Hello Kitty character from this image I found trough Google:


Aren't those little pilgrims so adorable?  To get a similar HK pilgrim girl, I used the graduation Hello Kitty from the Hello Kitty Greetings Cart:


Then, I used my Gypsy to size the hat and collar of the pilgrim girl from Paper Doll Dress Up to fit this Hello Kitty Cut.


I cut Hello Kitty's clothes in dark gray to look all pilgrim-like, and I cut the collar and hat from white.  Once the images were all cut out, I had to do some trimming with my craft knife to make the collar look like it belonged on Hello Kitty.  It needed to have that black outline around it, like all of the HK cuts have:


Then, I needed that same black outline around the hat, so I adhered it to black cardstock and trimmed around it with scissors:


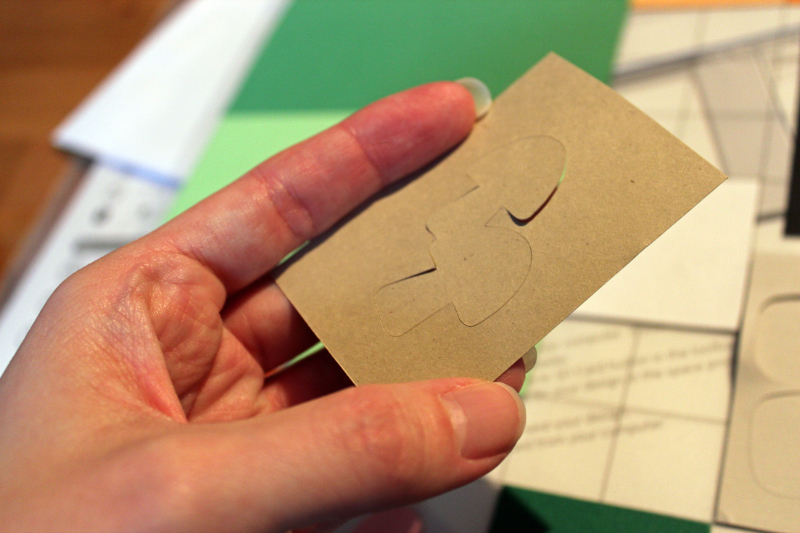
I also had to trim the line on the inside with my craft knife so it would show up:


Once I did that, my Hello Kitty Pilgrim girl was all done!  I decided to use a pink Martha Stewart Opaque Marker for her nose and some pink chalk for her cheeks so she didn't look like she came out of an old black and white cartoon.  Here's my card again so you can see what I mean:


Doesn't she look like she has gobbled 'til she wobbled?  :)

Okay, now how about some BLOG CANDY??? YAY!  One lucky follower will get this Pink By Design Honey Pie Stamp set.  You know, anything that says "pie" makes me think of Thanksgiving! Ha! 


 Here's what you need to do for a chance to win:

1.  Be a follower of my blog and leave a comment letting me know.  Make sure you leave your e-mail address for me.

If you'd like EXTRA CHANCES to win, you can do any of the following.  Just make sure you leave me a new comment each time you do something extra so you get extra entries in my "drawing".

2.  Become a follower of my Facebook page and leave a comment letting me know (here AND on my Facebook page...I love comments on my FB page!).  Make sure you leave your e-mail address in your blog comment (not on Facebook).   :)

3.  Grab my blinky from my right sidebar and post it on your blog.  Then, leave me a link to your blog so I can go check it out.  Be sure to leave me your e-mail address, too.

Please, only US and Canadian mailing addresses...sorry. I'll randomly choose a winner on Wednesday, November 9.

Thanks so much for stopping by today!  Your next stop is the lovely and super-duper talented Jenny.  Here's the rest of the blog hop lineup, just in case you get lost along the way: 

Crazy About Cricut **NEXT STOP!**


Friday, November 4, 2011

Weekend Activities

Happy FRIDAY!  Yay!  I wanted to let you know about a few fun things going on this weekend.

First, be sure to join us for the Pink By Design Ustream and Stamp Release tonight at 8:30 CST.  You'll get to see all of the new stamps that are coming out this month, plus you can take part in a fun project.  If you'd like to participate, here's what you'll need:

2 scalloped circles--any size--but not smaller than 2 inches
adhesive
several pieces of scrap ribbon (does not need to match)

Also, I hope you'll stop by tomorrow for the Hello Kitty Blog Hop.  There will be tons of adorable projects, plus some fun blog candy (of course)!  See you then! :)


Monday, October 31, 2011

Better with Friends (and my NEW Silhouette Cameo!)

Hey, everyone!  Today is my day to post over at Pink By Design, and I have a sneak peek to show you.  But first, I want to share the adventures I've had today with my new Silhouette Cameo.  


I've been so excited to get this thing, and I finally got the chance to set it up today.  Well, here's what I learned from my VERY frustrating day with my Cameo:

1.  Make-the-Cut apparently can't use the Cameo just yet.

2.  Silhouette Studio doesn't support SVG files unless you do all of these extra steps to get them to work.

3.  If you want to use SVGs with Silhouette Studio (without all the extra steps), you have to purchase the Designer Edition (which I finally decided to do).  I do like that the SVGs import their color into Silhouette Studio...it makes it much easier to choose paper colors then.


4.  If you buy the Designer Edition, you have to place a cut outline around your SVGs before they'll actually cut (which I finally figured out after TONS of frustration and time on the Internet).  That step is really simple, though, and, once I figured that out, cutting went very smoothly.

5.  You should follow the recommendations in the User Manual, and not the settings in Silhouette Studio, if you want your cuts to go all the way through your paper.


Having said all of that, I will say that the Silhouette cut through the thinner cardstock I had on the mat beautifully at the setting I used. Just look at those perfectly circular eyes!


 I'm excited to try it out again at the proper settings...I think I'm going to be SOOOO happy with my new toy. So, now I have two toys to play with...my Cricut for my cartridges (which I still love and can FINALLY update without fear of losing the capability to cut SVGs), and my new Silhouette for cutting SVGs and Silhouette files.  Anyway...on with my sneak peek.  Here it is:


I got this great sentiment from a set that's going to be released this Friday.  You're going to LOVE this sentiment set!  The sushi roll cuts came from the Lettering Delights Bento Box SVG set.  I love these little guys, and I think they look so friendly!  This card is 5.75" square, and will fit in a 6" square envelope.


Here's a closeup of that sentiment.  


I'm entering this card in the following challenge:
Frosted Designs Fabulous Friday--Food & Candy
Wacky Wednesday #57--Anything Goes
Party Time Tuesday's Challenge #39--Anything Goes


Be sure to join us on Friday, November 4, for the Pink By Design Ustream and Stamp Release!  It starts at 8:30 pm CST HERE.  I hope to see you there! :)

Thanks so much for stopping by today!


Sunday, October 23, 2011

Baby Shower Blog Hop WINNER!!!

Hey, everyone!  I have a winner from Kimi's Baby Shower Blog Hop.  I was supposed to choose a winner on Wednesday, but I guess it slipped my mind.  So, without further ado, the winner is...


Congratulations, MissScrapAlot!  I'll be e-mailing you to get your mailing address.  Be sure to check your junk/ spam folder...these e-mails sometimes get lost there. :)


Sunday, October 16, 2011

Got Candy?

Happy Monday, everyone!  Can you believe Halloween is just two weeks away?  It's my day to post over at Pink By Design, and I have a cute little Halloween card to share with you.  I've been dying to use the cute little stamps from the Pink By Design's Guess Who? September 2011 Stamp of the Month Set, and I was so excited when the Copics I ordered finally came in.  I knew exactly what I wanted to do.  Here's my card:


This is my first time using my wonderful Copics, so I hope you like my coloring. :)  If you'd like to see how I made this card, including all of the paper measurements, etc., I have a detailed, step-by-step tutorial waiting for you over at Pink By Design.  I hope you'll leave a little comment for me here, then head on over there to check it out.  I'd also love to hear your comments about my tutorial once you get there.

Thanks so much for stopping by today!  Have a great Monday!


Saturday, October 15, 2011

Kimi's Baby Shower Blog Hop

Happy Saturday, everyone!  A very special bloggy friend of mine, Kimi from Lovebug Creations, is having a little bambina soon, so some of us got together to make her all sorts of fun creations!  So, welcome to Kimi's Baby Shower Blog Hop!  If you came here from Jenny at Crazy About Cricut, you are in the right place.  If you just happened upon this post and would like to start from the beginning, you can start at Lovebug Creations.  Oh, and we all have a message for Kimi, so make sure to read all the way to the end to find out how you can win some EXTRA blog candy! :)


Some of us are creating layouts for the baby's first scrapbook.  I made two layouts for today: one for the month of September, and one for Baby's First Tooth.  Here they are:


This layout can hold one 4" x 6" photo and four 3" x 3" photos (shown in blue).  Really, Kimi could choose to put any size in the strip on the right (3" x ??).  I used my Opposites Attract cartridge to cut the "September Sweetie" title, and I used the Lettering Delights Feels Like Autumn Cut It Set for the apple bushel and the apples.  I added some ink, ribbon, brads, and white doodling marks, and this layout was all done!


This layout holds one 4" x 6" photo and two 4" x 4" photos.  I got all of the cuts for this one from my Baby Steps cartridge.  I added some ink, ribbon, and white doodles to add a little umph.  I hope you like the layouts, and I ESPECIALLY home Kimi likes them. :)

Alright, how about some BABY SHOWER BLOG CANDY???  
I'm giving away a We R Memory Keepers Piercing Mat.  It's designed to be used with the Sew Easy, but there are OH so many more uses for this baby!  Here's what you need to do for a chance to win:

1.  Be a follower of my blog and leave a comment letting me know.  Make sure you leave your e-mail address for me.

If you'd like EXTRA CHANCES to win, you can do any of the following.  Just make sure you leave me a new comment each time you do something extra so you get extra entries in my "drawing".

2.  Become a follower of my Facebook page and leave a comment letting me know (here AND on my Facebook page...I love comments on my FB page!).  Make sure you leave your e-mail address in your blog comment (not on Facebook).   :)

3.  Grab my blinky from my right sidebar and post it on your blog.  Then, leave me a link to your blog so I can go check it out.  Be sure to leave me your e-mail address, too.

Please, only US mailing addresses...sorry. I'll randomly choose a winner on Wednesday, October 19.  


OH!  Remember that message we have for Kimi?  You'll find a letter on each person's blog along the way.  Put all of the letters together to figure out the message, then leave it on the last blog for a chance to win some  more AWESOME blog candy!  My letter is: A.


Thank you so much for checking out my layouts.  Now, hop on over to Liz's Blog to check out her ADORABLE project! Here's the whole lineup, just in case you get lost along the way: 


Thanks for stopping by!