Showing posts with label borders2 cutting file. Show all posts

Tuesday, July 14, 2015

Make a Wish layout

Hi fellow scrappers..
It's Nanné here today to share a fun Birthday layout I created for my son's 22nd Birthday, which was last week.. I'm telling ya, where does the time go?..


Here is what I created using some of the fun files from the Make a Wish cutting file:

This was a lot of fun to put together.. I used one of the labels from the  Layered labels 1 cutting file to create the large black background..

How about a few close ups and details:

the birthday cake  is in the Make a Wish cutting file and the Arrow is in the Arrows cutting file..
I attached both files using foam tape..

I added the fun sentiment/word art from the Make a Wish cutting file and the tab is in the newest cutting file Tab shapes cutting file..

I love these candles and wanted to create a fun border with them, they are also in the Make a Wish cutting file.. I also added a scalloped trim using the scalloped border from the Borders two cutting file

Here are the cutting files I used:
Arrows Cutting Files Make a Wish Cutting Files
Tab Shapes Cutting Files Borders 2 Cutting Files
Layered Labels 1 Cutting Files

Thanks for stopping by today..
Till next time..
hugs
Nanné

Tuesday, February 24, 2015

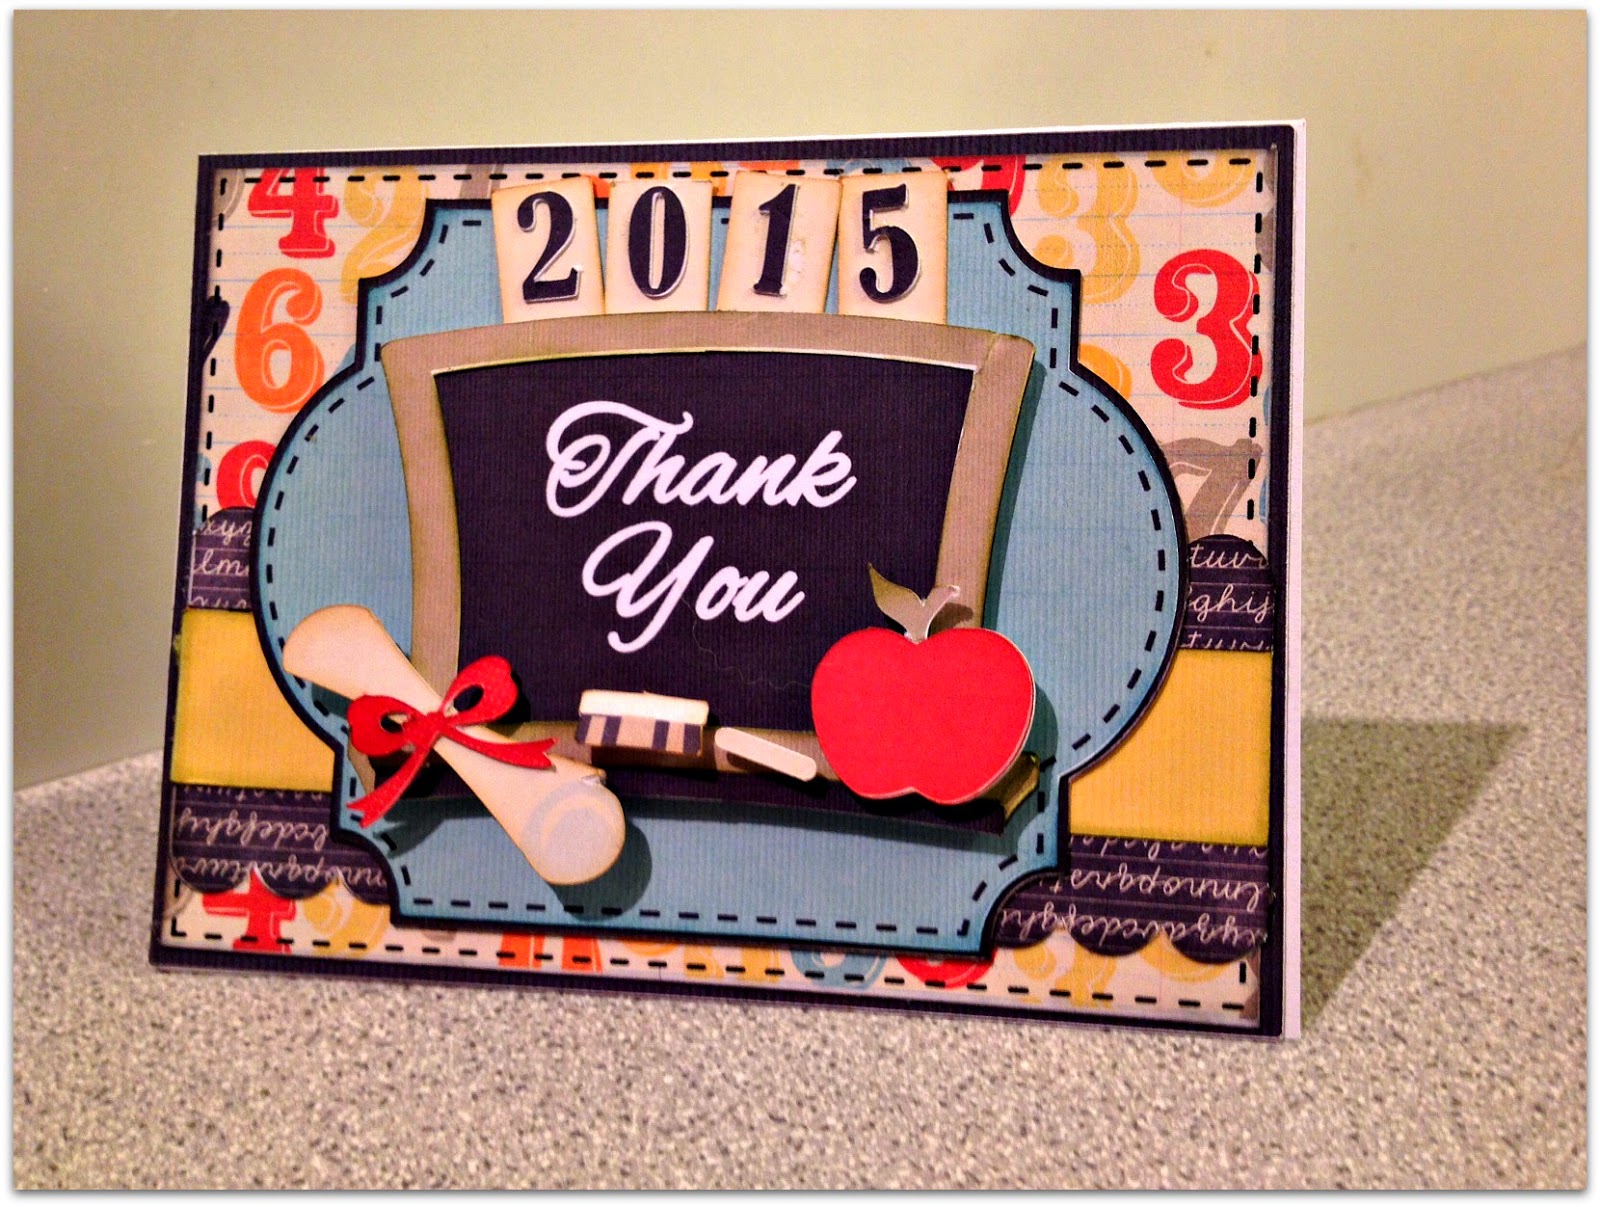
Thank you card

Hi crafters..
It's Nanné here to share a thank you card I created and it could be used for teacher appreciation day or for us Finns, we always give the teachers a small gift and card at the end of the school year to say thank you for taking such good care of our children..

Here is what I created:

I absolutely adore the school themed cuts Lisa has..
I used the Print and cut in the Silhouette software to create my card..
Was able to print the Thank You right onto my image :)

added some fun school themed elements to my card, chalk board, eraser, chalk, apple and a diploma..
I attached the cutting files to my card using foam tape to add dimension..

the files I used to create my card:

Blackboard Cutting Files Hats Off Cutting FilesApple Picking Cutting Files
Layered Labels 2 Cutting FilesBorders 2 Cutting Files
and there ya have it...
Lots of fun files to create a fun card for your favorite teacher..

Thanks for stopping by today..
till next time..
hugs
Nanné 

Wednesday, October 22, 2014

Be good to yourself!


Good Morning!

Hope you are having a great week.  I have a fun card to share with you today.  I made it for a friend who recently had surgery.  I thought it would cheer her up.  


To make my card I used the Star Spangled Card Cutting Files. I sized it to 5.50 x 5.50 to make it the square shape.    The flourish is from the Flourishes 2 Cutting Files.  It is free until Thursday night.  The scalloped circle is from the Scalloped Circles Cutting Files.  The Scalloped Border is from the Borders 2 Cutting Files


Don't forget that there is the NEW Trick or Treat Challenge going on right now. 

Have a great week!


Tuesday, September 9, 2014

Spread your Wings Card

Happy Tuesday fellow crafters..
Its Nanné here to share a card with you I created using one of the Flowers from the Spring Garden cutting file and creating a 3D flower..

Here is what I created:

It measures 6x6.. The branches are on the Honey Bee's cutting file
and the scalloped frame I created using the Scalloped borders from the Borders 2 cutting file.. I just
welded 4 of them together to create the frame :)

close ups anyone?

used foam tape in between the layers of the flowers and then dabbed some baby blue 
and green stickles on it..

Here you can see the stickles on the leaves..

and my cute butterfly all stickled up..
and there you have the card that I created..

till next time..
hugs
Nanné

Tuesday, August 26, 2014

Life's A Circus Card

It's Nanné here to share a whimsical card that I created using some of my favorite Graphic45 papers (Le Cirque collection) and the elephant from the Birthday Critters cutting file.
I wanted to look like the elephant was holding a magic feather :)  Us Disney movie fans know where that idea came from..LOL
I also created rosette from the scalloped edge cutting file.. It was super easy by adding folding lines and smooshing it all together.. punched a 1" circle for the bottom and added a shiny brad to the center, tucking the feathers up top..

Here is what I created:
because I added an "off the page" element (feather), it was a bit a difficult to photograph :)

side view.. lost of layers using foam dots..

how about some close ups and details:

I folded a long piece of paper and then added the sentiment on top of that..
for the banners I used the Sentiment spots cutting file..

This has to be the cutest elephant ever :)  
He can be found in the Birthday Critters cutting file

The scalloped border that I used to create rosette is in the 
Borders2 cutting file.. I cut two of them at 6" long, adhered them together at
both ends and then pushed the center down onto a 1" circle cut..
Super fun and easy :)

and there ya have my fun Circus themed card..
decided this would make a great birthday card :)
so, till next time...
Hugs
Nanné