Showing posts with label Sentiment Spots 1 Cutting File. Show all posts

Monday, July 20, 2015

Watercolor Flower Arrangement

      Hey all! Leah with you today. I have something with an artsy feel to share with you all today. I really was in the mood to do something totally different from my usual layout. I also wanted to play with watercolor. Luckily the watercolor paper cut beautifully with my Silhouette Cameo. I started with laying this out and sizing everything using my design software. This ensured that I had room for the flowers and that I had a general idea on the flower placement. 

   I used Distress Inks as my watercolor. I squashed the ink directly to a non stick mat and added Perfect Pearls spray and water and painted away! The gold really makes this card classy as well and helped direct me to adding gold pearls into the flower centers. 


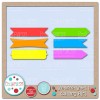
      I just used pieces and parts of the file below, kinda a mix and match thing. 

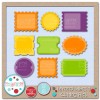
Sentiment Spots 1 Cutting Files 
   Hope you are enjoying your summer and getting plenty of crafty time in! 
post signature

Wednesday, March 11, 2015

We're all Irish on St. Patty's Day!


Good Morning!

Melisa here this morning to share a St. Patrick's Day card with you.   


I used the Scalloped Circles Cutting Files for my card base.  The circle is from the Layered Labels 1 Cutting Files.  The sentiment shape is from Sentiment Spots 1 Cutting Files.  And the adorable little Leprechaun is from the Little Leprechaun Cutting Files.  


Have a great rest of the week!

Don't forget to join us for the Get Cookin Blog Hop this weekend.  


Wednesday, January 28, 2015

My heart throbs for you


Happy Wednesday!

 Hope you are having a great day!  Today I have a cute Valentine's Day card to share with you.  I will be linking this up with the Made with Love challenge that is going on now.  You still have time to join us, it doesn't end until January 31, 2015.  


I used the A2 Card Bases 1 Cutting Files for my card base.  The sentiment spot is from Sentiment Spots 1 Cutting Files.  

The Robots are from the Robots Cutting Files.  I love that just by changing the colors of their clothes they can be either for girls or boys.  Their faces are from Peachy Keen's Variety Face Assortment. 


Thanks for stopping by!  Have a great day!

Melisa

Wednesday, October 8, 2014

Sweets and Treats


Good Morning!

Can you believe we are already in October?  I sure can't and since Halloween will be here before I know I decided to try and get ahead of the game and start making treats for my boy's classes. 


For the topper of my treat bag I used the Handled Treat Bag Topper Cutting Files.  I was able to get 9 of these toppers from each 12x12 sheet of patterned paper.  Not too bad since I have to make about 90 of these guys.  LOL.  

The Caramel Apple is from the Fair Food Cutting Files.  The sentiment spot is from the Sentiment Spots 1 Cutting Files.  My sentiment is from Scrappy Mom's Bewitched Stamp Set.  The twine is Trendy Twine's Orange Licorice.     


Don't forget to join us this weekend for the Pretty Paper, Pretty Ribbons Trick or Treat Blog Hop.  You can join the Event of Facebook HERE.  The fun will start at Lisa's Blog.


Thanks for stopping by today!

See ya on Saturday!


Wednesday, September 24, 2014

Best Witch~es


Happy Wednesday!

I know that Halloween isn't until next month but I thought I would get a start on making some Halloween cards.  


To make my card base I used the Scalloped Frames Cutting Files.  I used the moon from the Wizard Owl Cutting Files.  He is still free until Thursday so don't forget to grab him HERE.  The witch is from the Little Witches Cutting Files.  The sentiment shape is from the Sentiment Spots 1 Cutting Files.  


I decided to enter this card into the Peachy Keen Sketch Challenge.  The sketch is below.  I used the Christmas in July Face Assortment for her face.  


Thanks for stopping by today!  Have a great day!


Monday, September 15, 2014

Birthday Wishes


Hiiiiii Pretty Paper, Pretty Ribbon people! Leah Schaeffer sharing today and I ADORE my Design Team days for PPPR! I am just in love with the designs by Lisa and am excited to share with you today!

I started with some party balloons from a graduation set, Hats Off. Being surrounded by little ones, I have no need for graduation hats but man…love that cluster of balloons! Super useful! I can see making this card over and over again and just changing the color scheme up! To make this a bit more "in the mail" friendly, you could choose not to add foam behind anything and keep this flat. Because of the layers already in the card, it will still be great without that, but of course, 3D pops!!!! =)
Another fun design idea when you are creating a card that really centers around a single focal image, is to try off setting it. I could have easily sized the balloons to sit in the center of the card, with no need to trim the sides. But there is something more interesting and organic about something that comes to the edges of a project. Hard to explain…but try it out! =)

I had this bold multi-colored polka dot background and decided to soften it slightly by adding a vellum layer over it. That also helps the balloons stand out just a bit more as well. Adding any layer helps build interest on a project so I decided to cut a vellum layer behind the sentiment spot as well. Not necessary but a nice detail! I also could of left the card just as is…but I felt like there was just a bit of something it needed…yes, even after adding the gems. And that was the black doodling around the card. So happy with that in the end!


Hope you enjoyed this card! For awhile I am keeping this in my scrappy room and not giving it away just yet! LOL! 

Hats Off Cutting File

Sentiment Spots Cutting File 

Thanks for the visit and those that spent some time with the entire team over the weekend and hopped along…don't forget to HOP…there are the CUTEST files available for FREE when you join us. Not to mention the many chances to win some $$$ to spend in the shop! NICE! 
post signature

Saturday, September 13, 2014

PPPR Fun with Puns Blog Hop

Hey, everyone! Welcome to the Pretty Paper, Pretty Ribbons Fun with Puns Blog Hop. We have all sorts of fun and PUNNY projects to share with you today using Pretty Paper, Pretty Ribbons files. We also have a fun freebie and a chance for your to win a Gift Certificate to the PPPR store. Oh, and we're also kicking off our next challenge theme. So, grab a muffin and some coffee, and settle in to see some awesome PUNNY designs. Here's what I created for the hop:


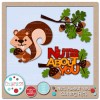
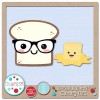
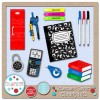
I used several sets to create this fun little card. I created the card base using a shape from the Layered Labels 3 Cutting Files set. The little squirrel is from the Nuts About You set. I used the release compound path feature in Silhouette Studio to remove his little nose and tooth from the squirrel so I could make them a little smaller. That way, the glasses from the Bread and Butter Cutting File would fit more naturally on his little face. Of course, he wouldn't be adorkable enough without his little graphing calculator from the Secondary Supplies Cutting Files. I put all of the files together in my Silhouette Studio Designer Edition software, created an offset outline, and did a print and cut with the whole image. That way, I could just pop it right on top of my card base without worrying about all of those tiny calculator pieces cutting out! I added a fun sentiment from the Pretty Cute Stamps Adorkable stamp set, and my fun and punninlicious card was all done!  Here are links to the products I used for my card:


Of course, I have a sweet little freebie just for you guys. This sweet little punny typewriter will be available for FREE on Saturday, September 13 and Sunday, September 14 ONLY. Then, it will be available for purchase in the PPPR store. You can get this freebie HERE:


This hop also kicks off our new Fun with Puns Challenge. Link up your PUNNY project that uses PPPR files for a chance to win a $20 Gift Certificate to Pretty Paper, Pretty Ribbons. The projects can be anything that shows a pun or play on words! You can link up and read all of the guidelines HERE:


Okay, now how about some BLOG CANDY????


One lucky hopper will win a $15 Gift Certificate to PPPR!  Here's what you need to do for a chance to win a chance to go shopping for FREE:

1.  Be a follower of EVERY BLOG in our little hop.  There are just 9 of us, so that shouldn't be too hard.  You won't be sorry...I'm super lucky to have such talented ladies on my Design Team.

AND

2.  Leave a comment at EACH blog along the hop.  Be sure to let us know you are a follower and leave us your e-mail address.

That's all you have to do.  If you would like EXTRA entries, you can also do one or more of the following:

3.  Like the Pretty Paper, Pretty Ribbons Facebook Page.  Leave me a separate comment on this blog telling me you did.  Don't forget to leave your e-mail address.

4.  Sign up for the Pretty Paper, Pretty Ribbons Newsletter and leave a comment on this blog telling me you did.  You'll get a weekly e-mail telling you about new files, coupon codes/sales, and freebies. Don't forget to leave me the e-mail address you signed up with. :)

I will randomly choose a winner of the hop candy on Tuesday, September 16, 2014.

Thank you so much for stopping by today! Your next stop on the hop is Jeanne.


Wednesday, August 27, 2014

Summer Fun Layout


Good Morning!  

Hope you're having a great week.  My boys went back to school a couple of weeks ago and I thought it would be fun to scrapbook some of their summer pictures.  My boys lived in our pool this summer so I have a lot of pool pictures to scrapbook.  


I made the background shapes using the Sentiment Spots 1 Cutting Files and the Layered Labels 1 Cutting Files.  


The "Fun" part of my title is from the Camping Fun Cutting Files.  I created the shadow behind "Fun" in the Silhouette Studio.  For the "Summer" part of my title I used the Popsicle Fever Cutting Files.  I just cut the "A Taste of" part off of Summer in the Silhouette Studio.  

The boy jumping in the pool is from the Diving Boy Cutting Files.  For his face I used Peachy Keen's In the Garden Face Assortment.  


Thanks for stopping by today!  Have a great week.


Tuesday, August 26, 2014

Life's A Circus Card

It's Nanné here to share a whimsical card that I created using some of my favorite Graphic45 papers (Le Cirque collection) and the elephant from the Birthday Critters cutting file.
I wanted to look like the elephant was holding a magic feather :)  Us Disney movie fans know where that idea came from..LOL
I also created rosette from the scalloped edge cutting file.. It was super easy by adding folding lines and smooshing it all together.. punched a 1" circle for the bottom and added a shiny brad to the center, tucking the feathers up top..

Here is what I created:
because I added an "off the page" element (feather), it was a bit a difficult to photograph :)

side view.. lost of layers using foam dots..

how about some close ups and details:

I folded a long piece of paper and then added the sentiment on top of that..
for the banners I used the Sentiment spots cutting file..

This has to be the cutest elephant ever :)  
He can be found in the Birthday Critters cutting file

The scalloped border that I used to create rosette is in the 
Borders2 cutting file.. I cut two of them at 6" long, adhered them together at
both ends and then pushed the center down onto a 1" circle cut..
Super fun and easy :)

and there ya have my fun Circus themed card..
decided this would make a great birthday card :)
so, till next time...
Hugs
Nanné

Wednesday, April 23, 2014

Let's meet up for adult beverages!


Good Morning!!

Melisa from Melisa's Crafty Creations here with you today.  I don't know about you, but it's hard to find time to go out with my girlfriends.  Sometimes it's our schedules that are keeping us from getting together, other times it's not being able to find a babysitter for our kids.  So I thought I would make a card to send to her so we can plan a girls night out soon.   


The card base is made using the Scalloped Circles Cutting File.  The patterned paper was cut using the Doilies Cutting File.  I selected the image, then I selected "Release Compound Path".  After that I moved my main image and deleted the rest of the inside of the shape.   The sentiment shape is from the Sentiment Spots 1 Cutting File.  The twine is Seaweed from The Twinery.


The Margarita is from the NEW Happy Hour Cutting File.  I used Glossy accents on the lime, stem of the margarita glass as well as the salt on the rim.  I wanted salt to have some texture to it so I let it dry a little bit and then took a needle and started poking the salt with the needle.  I did that while blowing on it to help get it to dry faster.  You could also use glitter for the salt but I end up making a huge mess when I use glitter.  The sentiment is from My Creative Time's Some Days Simply Require stamp set.  


Thanks for stopping by today!  Have a great day!!