Showing posts with label Layered Labels 3 Cutting Files. Show all posts

Tuesday, July 26, 2016

Burger shaped card

Hi fellow paper crafters..

It's Nanné here today to share a shaped card I created using some of the images from the Cookout cutting file..

Here is my card:

I absolutely love cheeseburgers and when I seen this cutting file, I knew exactly what I wanted to create :) 

I had so much fun adding all of those delicious layers to my burger..

Here are the files I used to create my card:


Cookout Cutting Files

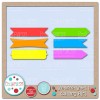
Layered Labels 3 Cutting Files

Thank you for stopping by today..
Till next time
hugs
Nanné

Monday, August 17, 2015

Sunset School Bookworms

   Hi all! It's Leah with you all today to share a fun school themed layout. School themed anything is such a favorite of mine and some of the new PPPR files are just too perfect! Darling on their own or just perfect to mix with some of the older sets (like the addition of the pencil on the page today). And speaking of the pencil, when you use any design software to help you design and cut your images, remember to play around with not only the sizing but with altering the shape in general. For example, I wanted a thicker pencil to ground my bookworms so I simply pulled the thin pencil into a chubby one. Easy! 
   These wormies are the best, ever! And the addition of the glasses makes them just that much better (plus, how cute to have the "cheeks" within the glasses!) Both worms were cut on printed paper and to add a little dimension to the bows, the back layer was cut twice. Then to adhere, I added a strong liquid adhesive to the center of the bow and then trimmed super small pieces of foam tape next to the center. That allows the center to hold down but the ends to pop! 

    With so much fun detail (like the ruler background) I didn't need much else for details. So after adding some enamel dots and letter stickers for the title, I was pretty much done! Well, got to add photos but I really wanted to use current ones so we've got another week before school starts. Luckily.

   And the always amazing files...


(pencil and ruler)

   Thank you so much for visiting and can't wait to hear what you think of this creation! Have a wonderful week everyone! 
post signature

Tuesday, July 28, 2015

Taco Night layout


Hi fellow scrappers.
It's Nanné here to share a fun layout I created using the Mexican Food cutting file..

We had Taco night last week and my mom came over for dinner..So, I snapped a few photos of her as she was eating her dinner..

how about some close ups and details:


aren't these chips cute or what?..

I also used one of the seed packets and added a heart and sentiment to it.. 
to represent the taco seasoning :)

I added the burrito and hot sauce bottle to the left side of my layout.


Mr Taco is on the bottom along with my fun title phrase..


I then decided it needed a little something, so added jalapenos and leaves around the yellow circle and then used the cheese spots from the chip bowl to create photo corners :)

Here are the files I used:

Mexican Food Cutting Files Chili Pepper Cutting Files
 Falling Leaves Cutting Files Layered Labels 3 Cutting Files 
 Seed Packet Cutting Files Valentine Sweets Cutting Files


and their you go, my cute layout for today's reveal..
Thank you for stopping by today
till next time
hugs
Nanné

Tuesday, January 13, 2015

New Arrival

It's Nanné here today to share a layout I created for my daughters friend who just had a baby boy a few months back..

Here's what I created:
Lots of fun baby themed goodies :D

How about some close ups and details:


This cute little baby, the box of wipes, baby powder, diapers and safety pins can be found in the "changing Time" cutting file.  I also used one of the bon bon holders from the "Valentines Sweets" cutting file to create the bed for the baby :)

The title I created using some free fonts I have in my font stash, I embellished it with some safety pins and hearts.. The hearts are from the "Valentines Sweets" cutting file..
I thought the layout could use some trim, so used the circle border from the "Borders 1" cutting file.

I wanted to add a few toys to this layout and the sail boat from the "Sail Away" cutting file was perfect :)  I added a few flourish swirls and those are in the "Flourish 2" cutting file.
The photo mats I created, well I used the Stamp edge label from the "Layered Labels 3" cutting file.

Love love love this cute little stork holding the baby.. He can be found in the "stork and baby" cutting file.

and what's a baby layout with out a teddy bear and a onesie..LOL
The teddy bear is in the "Santa's Helpers" cutting file and the onesie can be found in the "Changing time" cutting file..  I also wanted to use a hanger, I found one in the "Mommy to be" cutting file. I then used my knife tool in the SIL software to remove the hanger from the clothing. 

and that explains how I was able to create this cute little baby layout :)

Thanks for stopping by today..
till next time..
hugs
Nanné

Tuesday, December 2, 2014

Christmas cookies layout

It's Nanné here and it's my turn to share a layout with you that I created as my design team project..

I baked and decorated my very first sugar Christmas cookies last year and thought it was time to scrap a page of it :)

Here is what I created:
I used the Christmas Cookies Cutting file for all of the cookies and the title "Christmas!"..
I added details using twine, ribbon, Zazz glitter glue and liquid pearls..

How about some close ups and details:

I added a photo of my cookie decorating..LOL Not too bad for my first attempt..
framed my photo using one of the labels from the Layered Labels 3 cutting file..

I used the top part of the Christmas cookie phrase from the Christmas cookies cutting file.
 Love this font..


I wanted a fun play on words style of title and so added two wreath cookies to replace the O's in the work Cookies.. Those are in the Christmas cookies cutting file.

These cute little guys are also in the Christmas cookies cutting file..


I also added two little tags and tucked those behind a few cookies..
The tags can be found in the Layered tags 1 cutting file..


and there ya have it, my post  for today..
I wanna thank you for stopping by today and do stop by Pretty Paper, Pretty Ribbons store and check out what adorable cutting files Lisa has..

Till Next time..
hugs
Nanné

Tuesday, September 16, 2014

It's Your Birthday!

Hello PPPR Friends!
 
It's Kathy, from Kathy and Kids, and I have this "punny" Birthday card that I am sharing with you today.
 
My oldest daughter's Birthday is tomorrow and I made this card to send to her.


Details:
(I cut 2 of the base cuts and then scored and folded the top one to make a card.)
"Orange You Awesome" stamp set by Pretty Cute Stamps
papers are by DCWV
twine
 
Have a great week and Thanks for stopping by!

Saturday, September 13, 2014

PPPR Fun with Puns Blog Hop

Hey, everyone! Welcome to the Pretty Paper, Pretty Ribbons Fun with Puns Blog Hop. We have all sorts of fun and PUNNY projects to share with you today using Pretty Paper, Pretty Ribbons files. We also have a fun freebie and a chance for your to win a Gift Certificate to the PPPR store. Oh, and we're also kicking off our next challenge theme. So, grab a muffin and some coffee, and settle in to see some awesome PUNNY designs. Here's what I created for the hop:


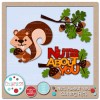
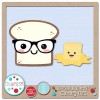
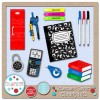
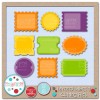
I used several sets to create this fun little card. I created the card base using a shape from the Layered Labels 3 Cutting Files set. The little squirrel is from the Nuts About You set. I used the release compound path feature in Silhouette Studio to remove his little nose and tooth from the squirrel so I could make them a little smaller. That way, the glasses from the Bread and Butter Cutting File would fit more naturally on his little face. Of course, he wouldn't be adorkable enough without his little graphing calculator from the Secondary Supplies Cutting Files. I put all of the files together in my Silhouette Studio Designer Edition software, created an offset outline, and did a print and cut with the whole image. That way, I could just pop it right on top of my card base without worrying about all of those tiny calculator pieces cutting out! I added a fun sentiment from the Pretty Cute Stamps Adorkable stamp set, and my fun and punninlicious card was all done!  Here are links to the products I used for my card:


Of course, I have a sweet little freebie just for you guys. This sweet little punny typewriter will be available for FREE on Saturday, September 13 and Sunday, September 14 ONLY. Then, it will be available for purchase in the PPPR store. You can get this freebie HERE:


This hop also kicks off our new Fun with Puns Challenge. Link up your PUNNY project that uses PPPR files for a chance to win a $20 Gift Certificate to Pretty Paper, Pretty Ribbons. The projects can be anything that shows a pun or play on words! You can link up and read all of the guidelines HERE:


Okay, now how about some BLOG CANDY????


One lucky hopper will win a $15 Gift Certificate to PPPR!  Here's what you need to do for a chance to win a chance to go shopping for FREE:

1.  Be a follower of EVERY BLOG in our little hop.  There are just 9 of us, so that shouldn't be too hard.  You won't be sorry...I'm super lucky to have such talented ladies on my Design Team.

AND

2.  Leave a comment at EACH blog along the hop.  Be sure to let us know you are a follower and leave us your e-mail address.

That's all you have to do.  If you would like EXTRA entries, you can also do one or more of the following:

3.  Like the Pretty Paper, Pretty Ribbons Facebook Page.  Leave me a separate comment on this blog telling me you did.  Don't forget to leave your e-mail address.

4.  Sign up for the Pretty Paper, Pretty Ribbons Newsletter and leave a comment on this blog telling me you did.  You'll get a weekly e-mail telling you about new files, coupon codes/sales, and freebies. Don't forget to leave me the e-mail address you signed up with. :)

I will randomly choose a winner of the hop candy on Tuesday, September 16, 2014.

Thank you so much for stopping by today! Your next stop on the hop is Jeanne.


Wednesday, August 13, 2014

Ice Cream, "Happy Birthday!"


Good Morning!

How is your week going?  Mine is going great.  Today is my friend Lorie's 50th Birthday.  So I thought I would make her a birthday card to celebrate it. 


The card base is from the Layered Labels 3 Cutting Files. The Banana Split is from the Ice Cream Treats Cutting Files.  Both of the cutting files are from Pretty Paper, Pretty Ribbons.   

The first face is from The Snow Cuties Face Assortment.  The second face is from The Moodies Face Assortment.  The last face is from The Cornies Face Assortment.  All the faces are from Peachy Keen Stamps.  The twine is Strawberry from The Twinery. 


Thanks for stopping by today!  Have a great week!